Configuration
Configuring the Buckaroo plugin for WooCommerce
A Buckaroo account is required to do test or live transactions with the Buckaroo plugin for WooCommerce. Please be aware that WooCommerce is also required besides WordPress. Below you can find the configuration steps:
1. Go to the Buckaroo Plugin settings in WooCommerce
- Sign in to your WordPress backend.
- Go to the Buckaroo plugin in the main menu in WordPress (on the left side).
2. Go to the settings
- On the plugin page, scroll down to find the general settings section.
- The following steps will show you what information needs to be filled in.
3. Fill in the settings below
3.1 Credentials
Store key
- Enter your Buckaroo Store Key.
- This key is unique for each store, allowing you to track transactions per store.
- You can find it in the Buckaroo Plaza → Settings → API Keys.
Secret key
- Enter your Buckaroo Secret Key.
- This key is unique for your entire Buckaroo account.
- You can also find it in the Buckaroo Plaza at Settings → API Keys.
Verify the credentials
- Please click on the "Save Changes" button at the bottom of the page.
- Now press on the "Test" button on the general settings page to verify if the store and secret key are correct.

3.2 Additional Settings
Select tax class for fee
- Select the applicable tax for the payment fee. This setting is only applied when a payment fee has been configured for a specific payment method.
Merchants are responsible for verifying whether payment fees are permitted under applicable European laws and regulations. For example, under PSD2, surcharges for certain consumer payment methods are prohibited. Ensure compliance for before enabling this option.
Payment fee display
- Select if the payment fee should be displayed inclusive or exclusive of VAT.
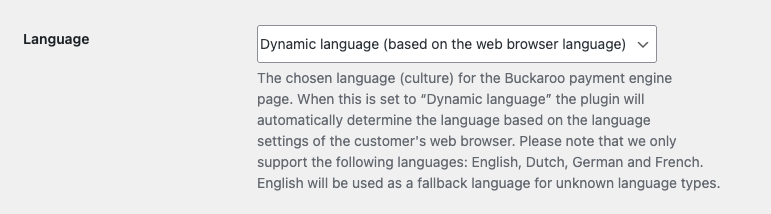
Language
- Set the language for the Buckaroo payment page.
- We recommend using the “Dynamic language” option so the payment page automatically matches the customer’s browser language (English, Dutch, German, and French supported, with English as fallback).
Debug mode (Advanced) (not required)
- Turn debug mode on or off — useful for troubleshooting or when advised by the Buckaroo support team.
- When the debug mode is enabled you can also select how the debug logs should be stored, in a file or a database or perhaps both.
Transaction description
- Enter a transaction description so that your customers will recognize the payment on their bank statement.
- We advise to use a value that contains for example the webshop name for better recognition.
- You can use our static tags like:
Refund description
- Enter a refund (transaction) description so that your customers will recognize the refund on their bank statement.
- We advise to use a value that contains for example the webshop name for better recognition.
- You can use our static tags like:
3.3 PUSH settings
The Buckaroo plugin should automatically handle the PUSH messages to the default shop URL.
This to update the orders with the correct status when a transaction is succesfull, rejected, failed or cancelled etc.
However in some cases this does not work out of the box due to customization in the webshop.
You can then follow the steps below to set the PUSH URL in the plaza manually.
Our support team can also be reached to double check this together with you if the orders are not getting the right transaction/payment status.
Click here to read the steps how to configure the PUSH URL manually
- Login with your Buckaroo account on → Plaza.buckaroo.nl
- Go to → Settings → Websites and select the website with the filters dropdown on the right side.
- Then go to the settings tab named → Push settings.
- The checkbox → Enable Push Response, must be checked 🗹.
- The fields → Push URL Success and → Push URI Failure must both be filled with a URL of your website.This is: https://[base URL website]/?wc-api=WC_Push_Buckaroo. The base URL of your website will in most cases follow the form of 'www.yourwebsite.com.
Note: There are exceptions to this.The most common exceptions are 'www.yourwebsite.com/index.php' and 'www.yourwebsite.com/NL' or a combination of both.
To find out what base URL your website uses, go to the front page of your website and click on some links.
You always look at the URL of the page you are on. The part at the beginning of the URL that stays the same is your base URL.
Make sureMake sure that the following PUSH settings are correctly as well:
- HTTP-Method must be set to → POST
- For → Push type choose → BPE3.0
- Set the Push Content type to → httppost
See which payment options you can offer through the Buckaroo WooCommerce plugin.
Overview of how Buckaroo manages versioning and where you can find the latest releases.
Overview of how Buckaroo manages versioning and where you can find the latest releases.
Updated 10 months ago