

Installation and configuration
Buckaroo hosts the connector and connects it for you, so most of the setup is in your Mirakl back office and your storefront checkout.
| Step | Where | Who |
|---|---|---|
| Buckaroo | Operator and Buckaroo account manager |
| Buckaroo Plaza | Operator |
| Mirakl back office | Operator |
| Mirakl back office, then Buckaroo | Operator and Buckaroo |
| Storefront | Operator (developer) |
| Test environments | Operator and Buckaroo |
flowchart LR
    S1["1 · Activate<br/>Split Payments"] --> S2["2 · Configure<br/>Plaza"]
    S2 --> S3["3 · Configure<br/>Mirakl"]
    S3 --> S4["4 · Connect Mirakl<br/>to Buckaroo"]
    S4 --> S5["5 · Integrate<br/>checkout"]
    S5 --> S6["6 · Test<br/>transaction"]
    S6 --> L(["Go live:<br/>repeat 2–5 on production"])
Complete all steps on your test environments first (Mirakl test environment and the Buckaroo test
environment), then repeat steps 2 to 5 for production.
Step 1: Activate Split Payments
Contact your Buckaroo account manager to activate Split Payments for your marketplace.
Buckaroo sets up:
- The Split Payments account that receives customer payments,
- Your operator account that receives commission and fees, and
- The partner configuration for seller onboarding.
You receive the store key of your marketplace store and the account ID of your operator account.
Step 2: Configure Buckaroo Plaza
- Log in to Buckaroo Plaza.
- Go to Settings › API keys and create a secret key for your storefront, if you don't have one yet.
- In the settings of your marketplace store, set the push URL to the endpoint of your storefront that
processes Buckaroo push messages. See Push messages. - Activate the payment methods you want to offer at checkout.
Push messages and the connectorPush messages go to your storefront, not to the connector. Your storefront uses them to confirm payments and link them to Mirakl orders (step 5). The connector doesn't need a push URL. It reads Mirakl every hour.
Step 3: Configure Mirakl
3a. Create the additional fields
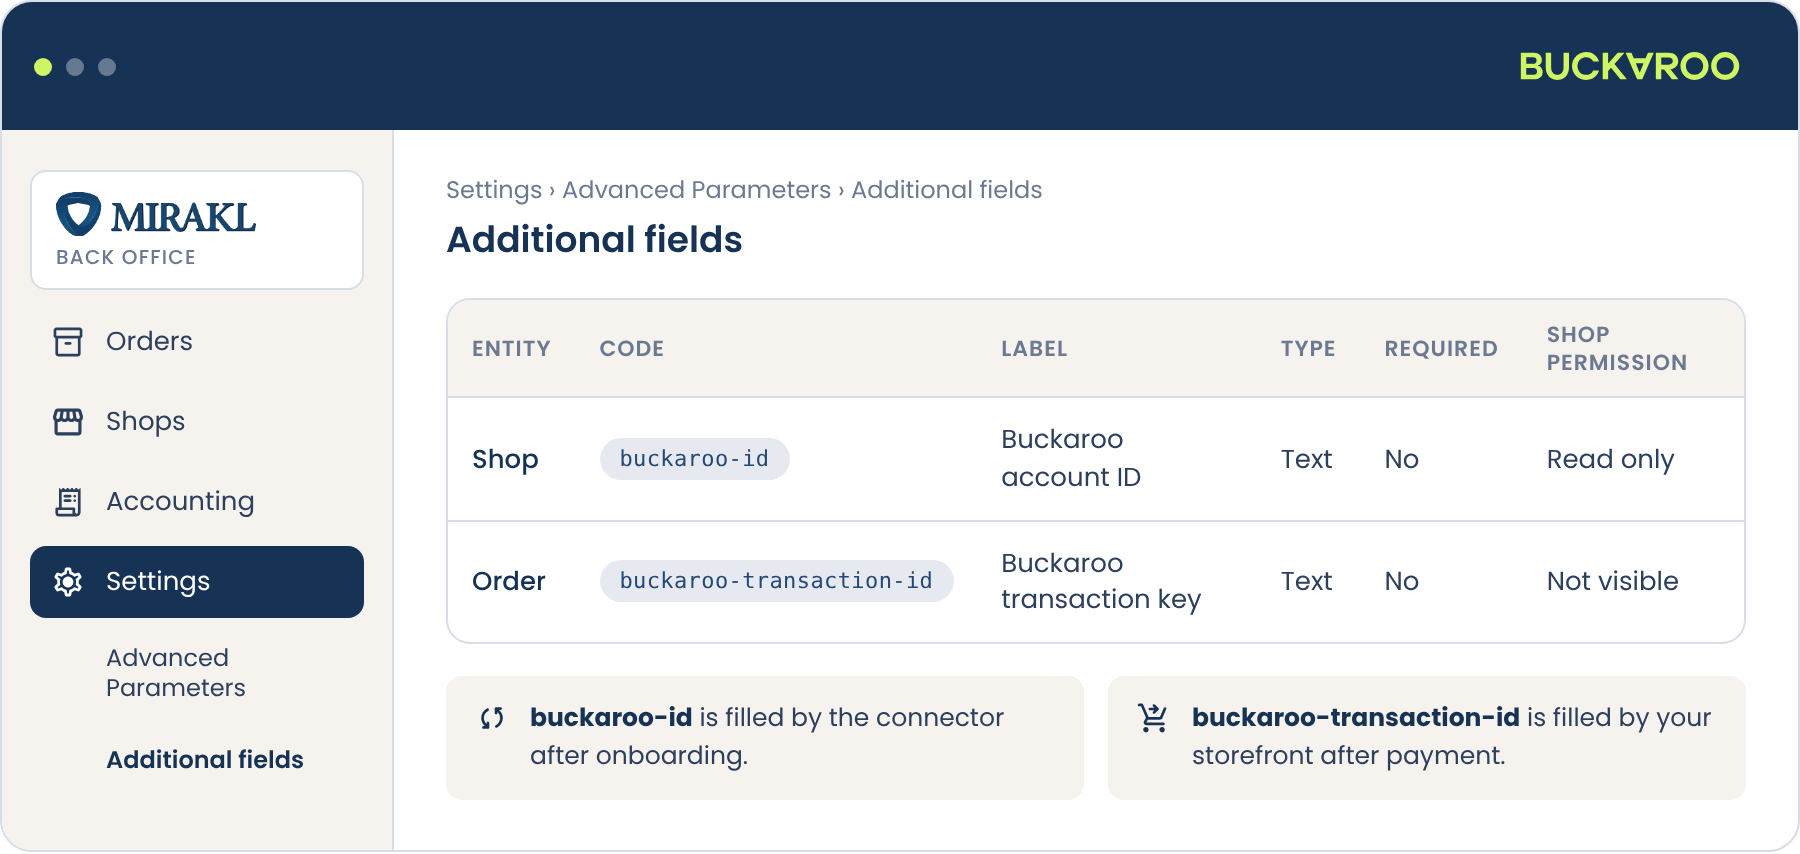
In the Mirakl back office, go to Settings › Advanced Parameters › Additional fields and create two fields:
| Entity | Code | Label (suggestion) | Type | Required | Shop permission |
|---|---|---|---|---|---|
| Shop | buckaroo-id | Buckaroo account ID | Text | No | Read only |
| Order | buckaroo-transaction-id | Buckaroo transaction key | Text | No | Not visible |
The codes must be exactly as shown. The connector fills buckaroo-id. Your storefront fills buckaroo-transaction-id.
3b. Enable shop KYC
Enable KYC for shops, so that new shops start with KYC status PENDING_SUBMISSION.
Only allow sellers to sell once their KYC status is APPROVED.
3c. Make the seller details mandatory
Seller onboarding uses the details from the Mirakl shop. Make these fields mandatory in seller registration:
corporate name, identification (Chamber of Commerce) number, tax identification (VAT) number, registration address, IBAN, bank account owner, and the contact's first name, last name, e-mail and phone number. See Seller KYC.
3d. Set up commission, fees and billing
Configure your commission rules, seller subscription fees (if any) and billing cycle in Mirakl as usual.
The connector uses the amounts on the accounting documents. See Payouts.
Step 4: Connect Mirakl to Buckaroo
- In the Mirakl back office, create an operator API key for Buckaroo. The connector uses it for:
- reading and updating shops (KYC status and
buckaroo-id), - reading orders, and
- reading accounting documents.
- reading and updating shops (KYC status and
- Send Buckaroo the following through a secure channel agreed with your account manager. Never send it by plain e-mail.
- your Mirakl API URL (for example
https://<your-marketplace>.mirakl.net/api) - the operator API key
- your Mirakl API URL (for example
- Buckaroo connects your Mirakl environment and confirms when it is live.
Repeat this for production with a separate API key.
Step 5: Integrate the checkout
Your storefront creates the customer payment as a Buckaroo split payment and links it to the Mirakl orders:
- Read
buckaroo-idof each seller in the basket. - Start a split payment with the
Marketplacesservice, with oneSellergroup per seller. - Process the push message.
- Write the transaction key to
buckaroo-transaction-idon every Mirakl order the payment covers, and confirm the payment in Mirakl.
See Pay-ins for the full flow and Split Payments requests
for the API reference.
Step 6: Test transaction
Run this test end to end on your test environments before going live.
| # | Action | Expected result |
|---|---|---|
| 1 | Create a test shop in Mirakl with all mandatory seller details | KYC status PENDING_SUBMISSION |
| 2 | Wait up to one hour | KYC status PENDING_APPROVAL. The seller contact receives the Buckaroo onboarding e-mail. |
| 3 | Complete the onboarding. In test, Buckaroo can approve the test seller for you. | KYC status APPROVED. buckaroo-id is filled. |
| 4 | Place an order with products from the test shop and pay at checkout | Order has buckaroo-transaction-id. The payment and split are visible in Plaza. |
| 5 | Have the seller accept and ship the order, then refund one order line | Within an hour, the refund is visible in Plaza with a seller part and an operator part |
| 6 | Run a billing cycle in Mirakl and mark the accounting document as paid | Within an hour, the seller and operator payouts are visible in Plaza |
If a step doesn't give the expected result, see FAQ and troubleshooting or contact
Buckaroo support with the Mirakl shop ID, order ID or accounting document ID.
Going live
Repeat steps 2 to 5 on production with production keys, and tell Buckaroo your go-live date so production is connected in time. After the first production payout, check it in Plaza.
Updated 8 minutes ago